Timeline Entries
The timeline allows you to add your own entries to the timeline, edit the ones we provide, and gives you full control over their notification schedule, custom tags, and calendar synchronization.
How to create an Entry
To create a new entry, navigate to any area where the timeline is visible to you and,
- Click “Add New Entry”.
- Enter the due date and text of the entry.
- In the “Details (optional)” field you can add links, notes, or instructions for handling this entry. You can bold, underline, or italicize the text to give the most important information visual impact.
- Click Save, or click the three dots of "More Settings" to modify your entry further.
Green outline indicates an upcoming entry created by Alt Legal
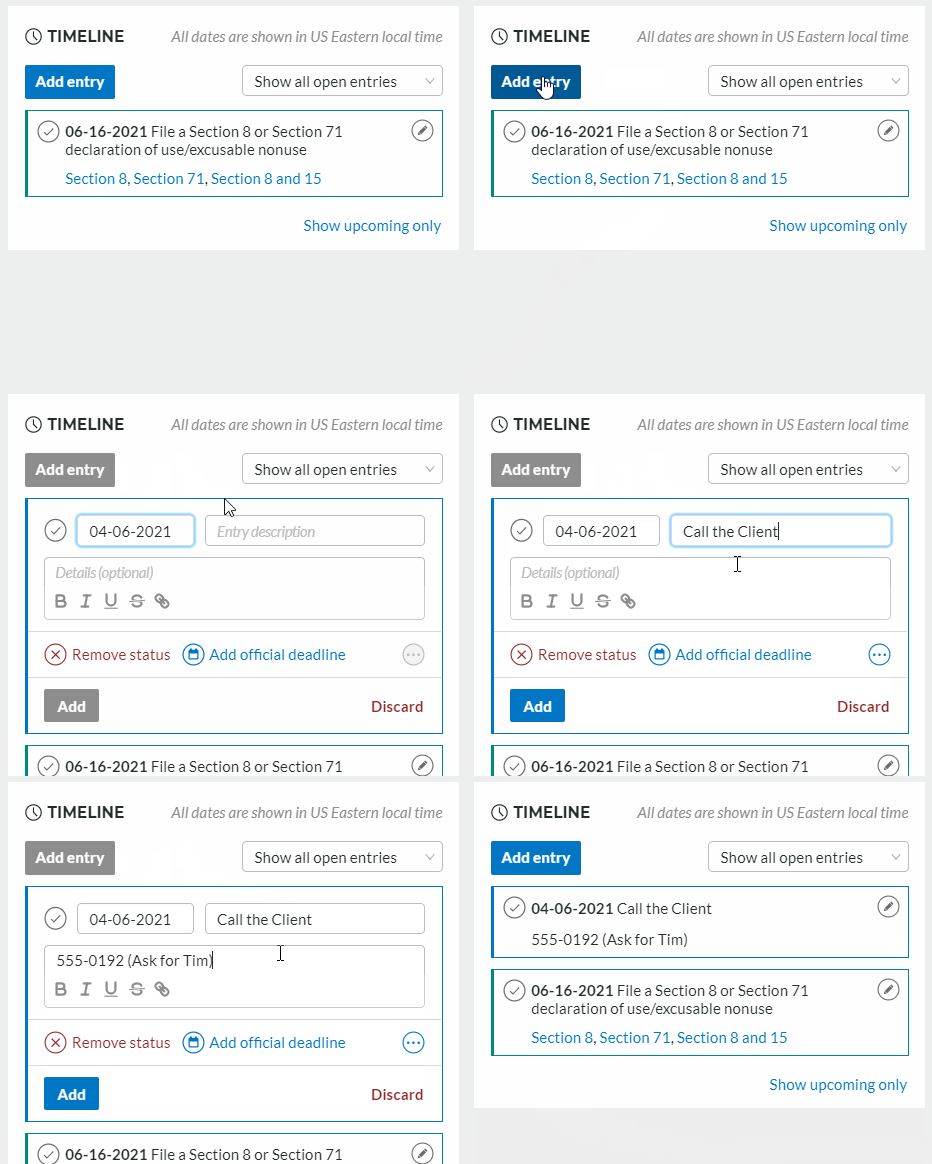
Below the details field you’ll see three options. “Remove (or Add) Status”, “Add Official Due Dates” and “More Settings”. Keep reading to learn more about each of these items.
How to resolve an Entry
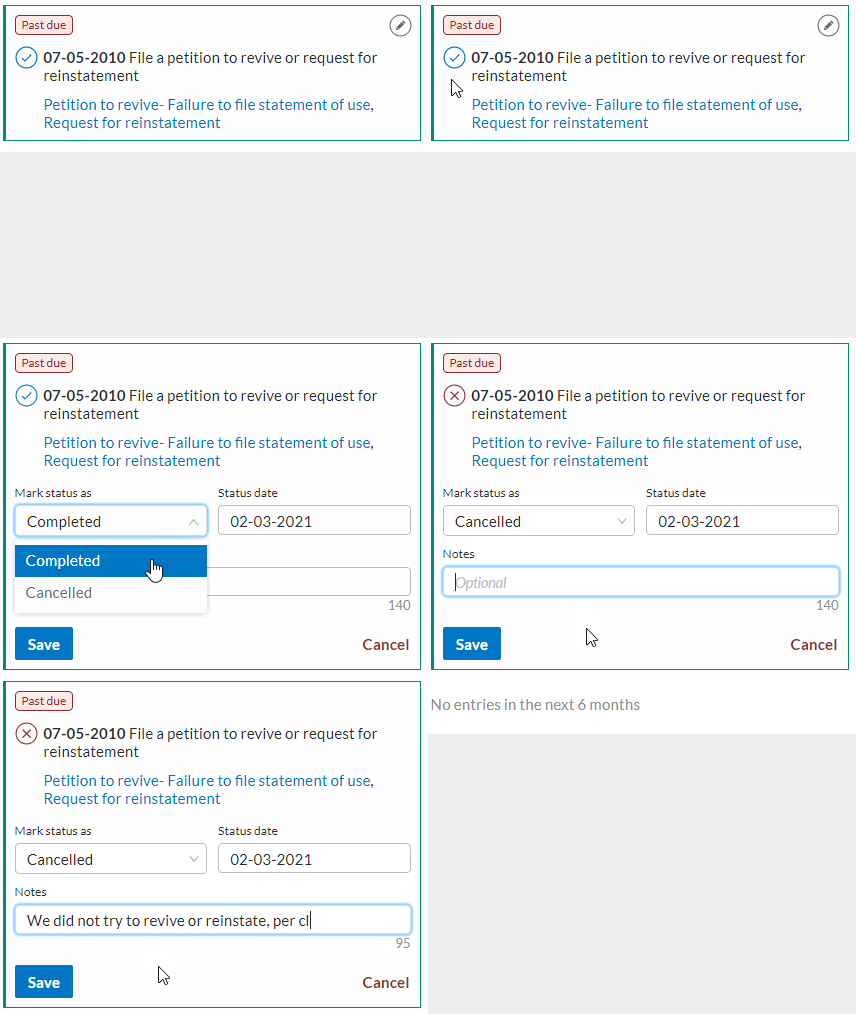
Click the checkmark next to the Entry Date, and select what type of resolution you'd like to apply. Completed means the entry was done, Cancelled would mean you didn't, or that a status change updated the entry.
What is an Entry Status?
A timeline entry has an optional status that is illustrated by the circular checkmark next to the date. It can be added or removed from custom entries, and cannot be removed from statutory entries. There are two categories of status. “Open” and “Closed”. “Open” entries are filtered, sorted, and reported by default, while “Closed” requires actively using additional filters to report.
When an entry does have a status, the three possible values are Active, Completed and Canceled.
Active
Active statuses are also considered Open. When an entry is Active, its tags are included in the matter tags, and its entry date is considered when sorting matters by active date.
Completed
Completed status is considered Closed for filtering, sorting and reporting purposes. Alt Legal will never automatically set status to Completed. Completed entries will not be included in open matter filters nor will their tags be included with the matter's tags.
Cancelled
A Cancelled status is also considered Closed. Alt Legal's automation engine automatically cancels entries in some circumstances:
- When items cannot be completed due to time. For example: if you add a mark to your docket 2 months past the deadline to file for international priority, a timeline entry would be created for the international priority, but marked Canceled. If you had in fact filed, or a prior attorney had, you may want to change the status to Completed and mark the date.
- When the documentary evidence indicates the task must have been done. For example: if an application has an office action, but then our automation engine detects the USPTO has received a response, we would automatically mark the "Respond to Office Action" timeline entry as Canceled.
Add Official Due Dates
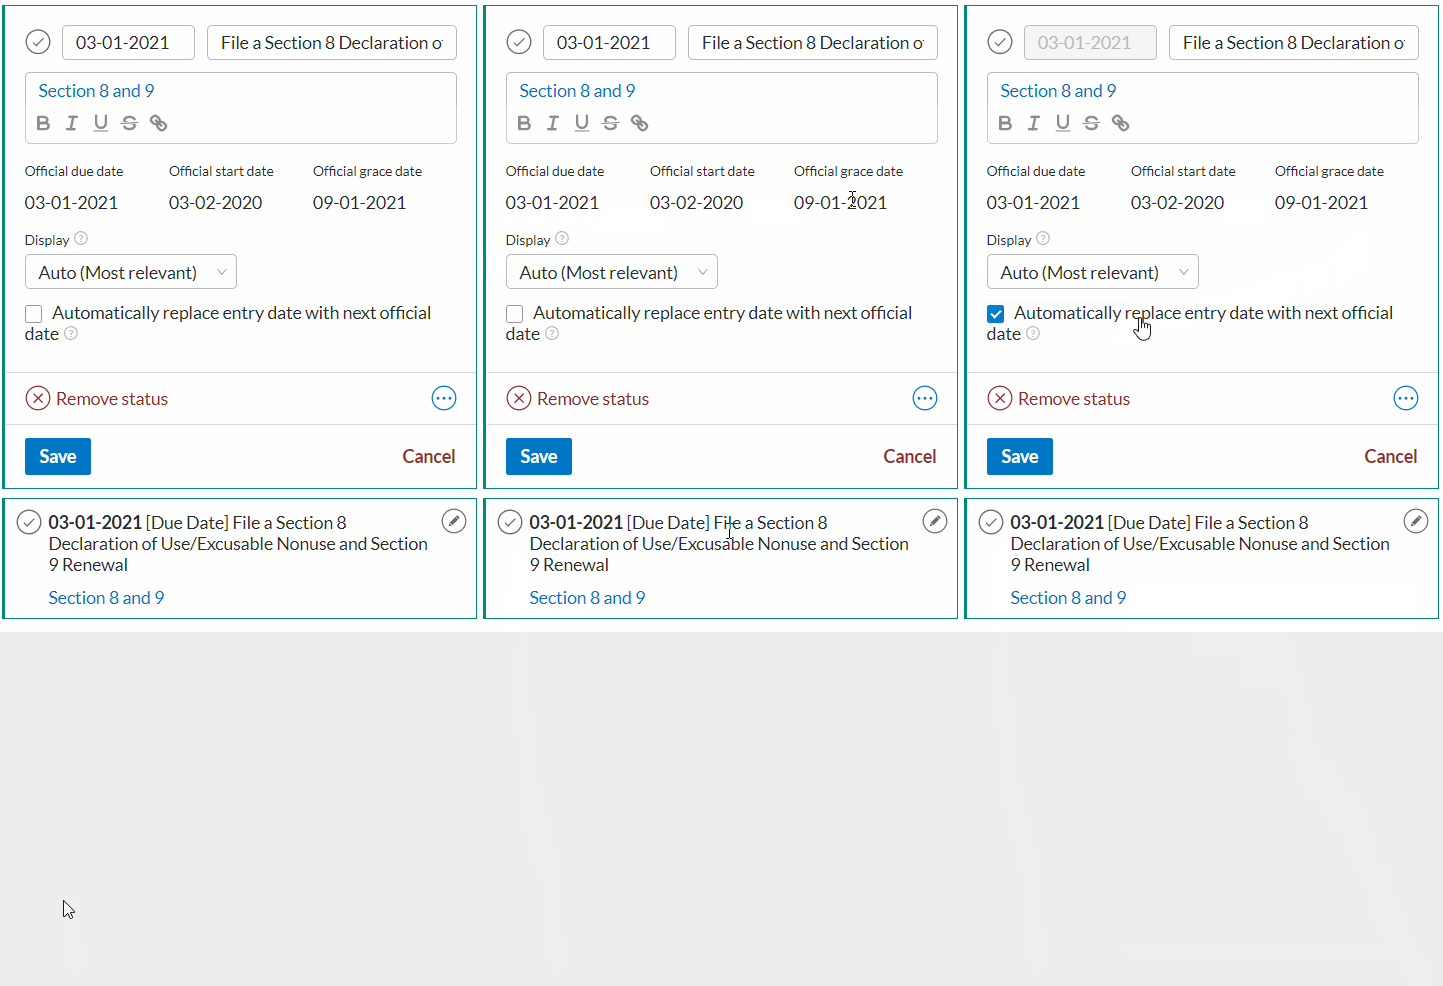
Selecting this allows you to put in official start dates, due dates, and grace period dates. These can be distinct from the entry date, and allow you to track multiple dates within a single entry, while still making the entry date the most prominent.
All of the Entries that Alt Legal creates for you will have an official due date that can be distinct from your entry date. So if you're the type of person that likes to get things done early, you can set the entry date to be before the official due date and get reminded to get it done days, weeks, months or maybe years before the official due date.
Automatically replace the entry date with next official due date
As part of the official due dates, you're given the option to lock the entry date to the entered official due dates. Checking the box will lock the entry date, and set it to the next upcoming due date. That may be the Official Start Date, Official Due Date, or the Official Grace Date. Then, once you save the entry, the title will get text that indicates what the entry date is referring to.
More Settings
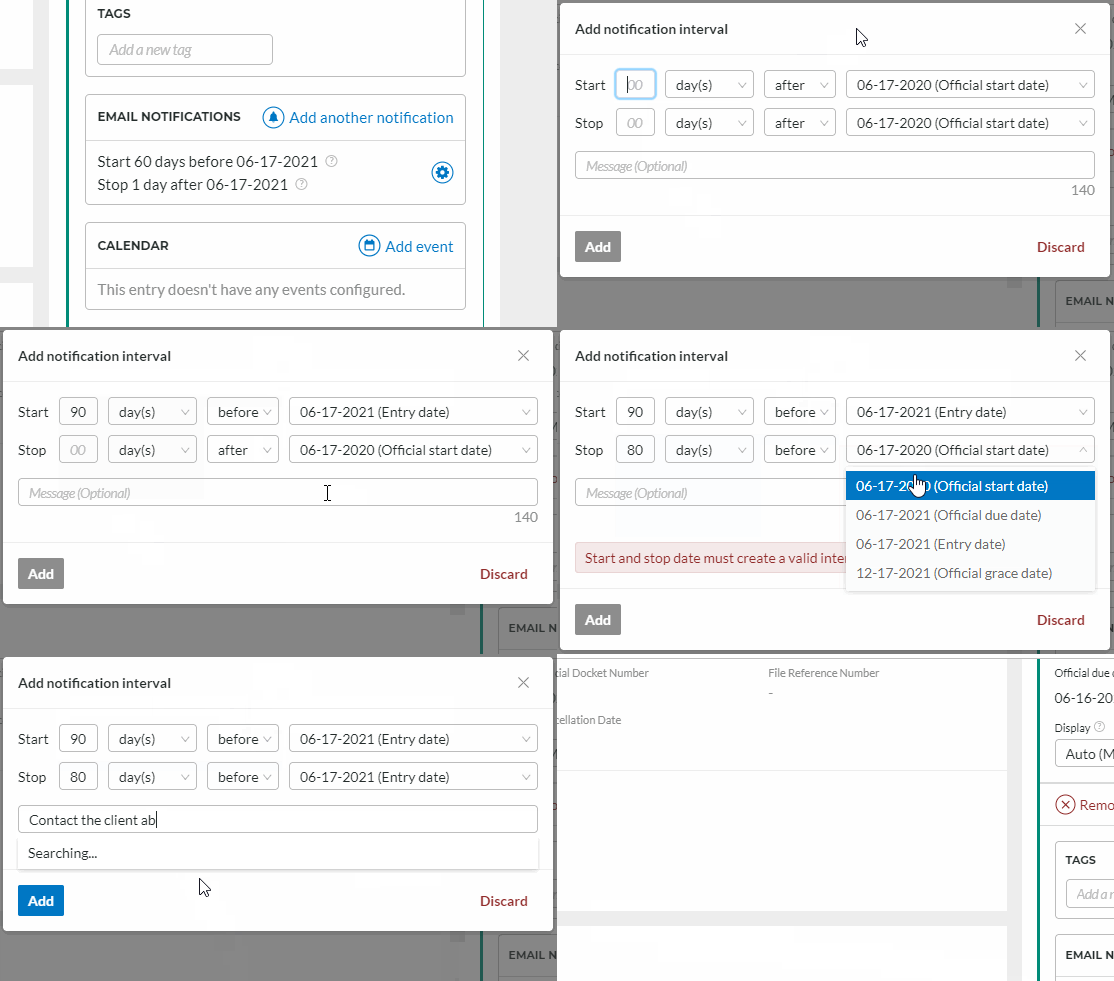
Clicking “More Settings” will open up the options to add a custom tag, enter notification intervals, and change how your calendar app syncs.
Adding a Custom tag
Custom tags allow you to locate distinct timeline entries without using the tags on the matter itself. Tags work much the same as they do when added directly to a matter, but on the timeline you’re able to put your own color scheme on a tag. These tags will appear on both the entry and the matter, so if you add the tag "Invoice" in red to the entry of when that action is due by, you'll see it on the matter even if you don't see the entry.
If you're in the entries table, and use the tag filter you're able to locate only the entries with the specified tag, making it easy to locate them.
Notification intervals
Notification intervals allow you to manipulate how often you see this entry in your docketing emails, as well as give the intervals specific titles. This is a great way to set up reminders for specific timeline entries. For example, on a Section 8 and 9 Filing entry, you can give yourself a 10 day long reminder, 90 days before the due date. You can even include a message to go along with it.
Calendar Sync
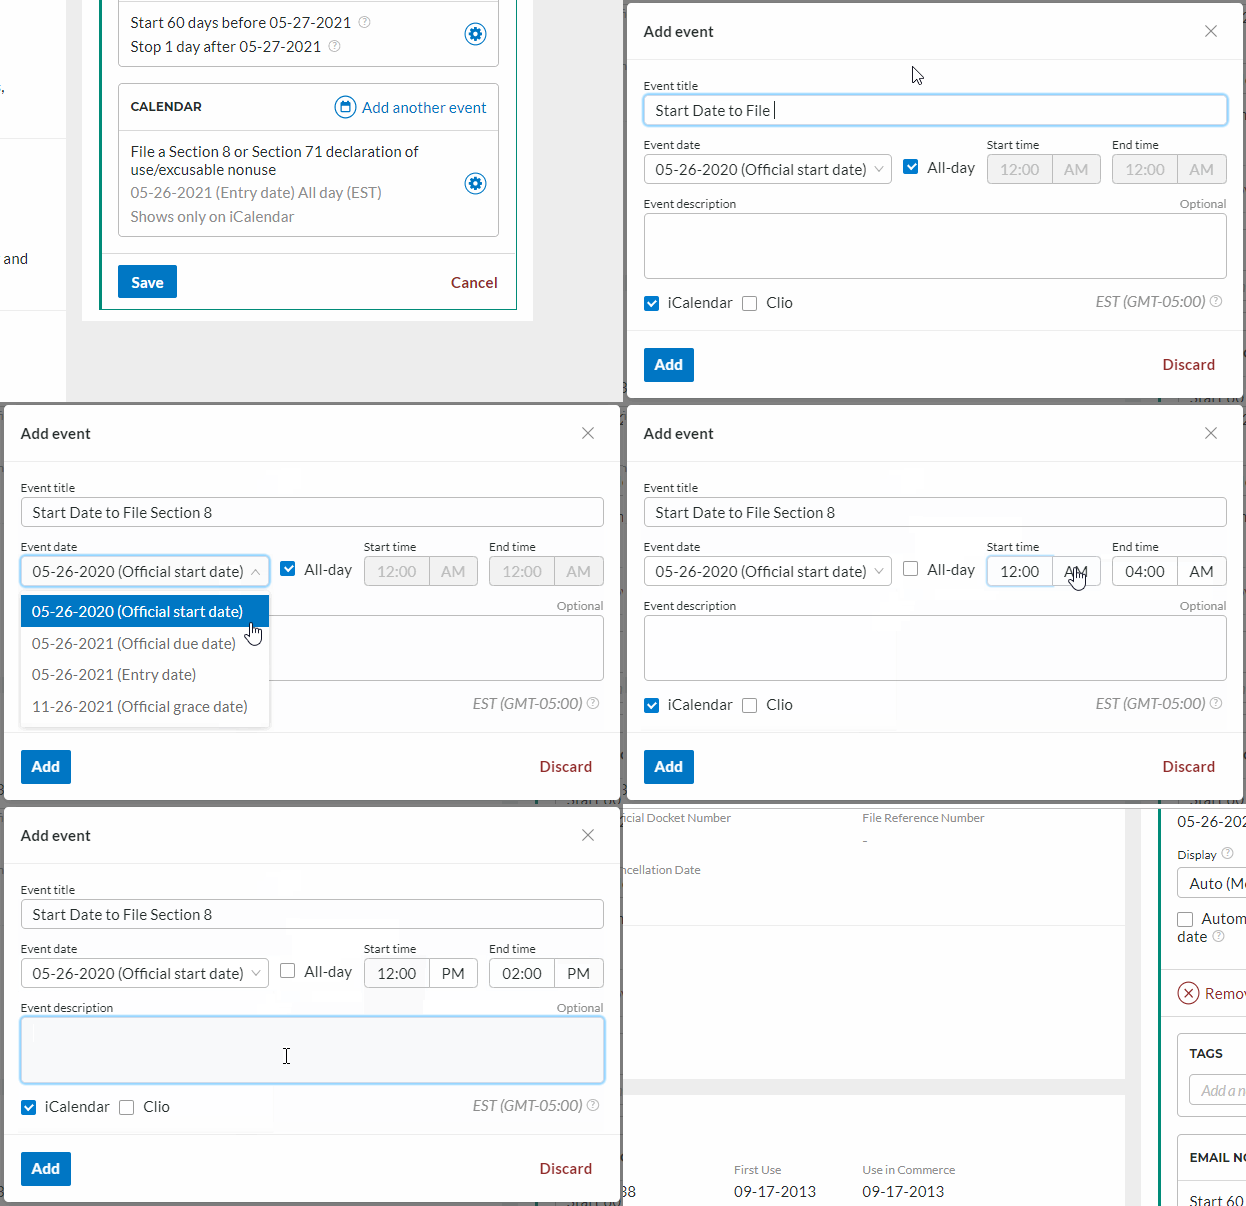
Each entry allows you to decide whether the dates it contains are synced into your Calendar app and/or into Clio, if you’ve enabled that integration. Each entry can have multiple calendar events, and each event can have distinct titles, dates, times, and descriptions.
Schedule Dates
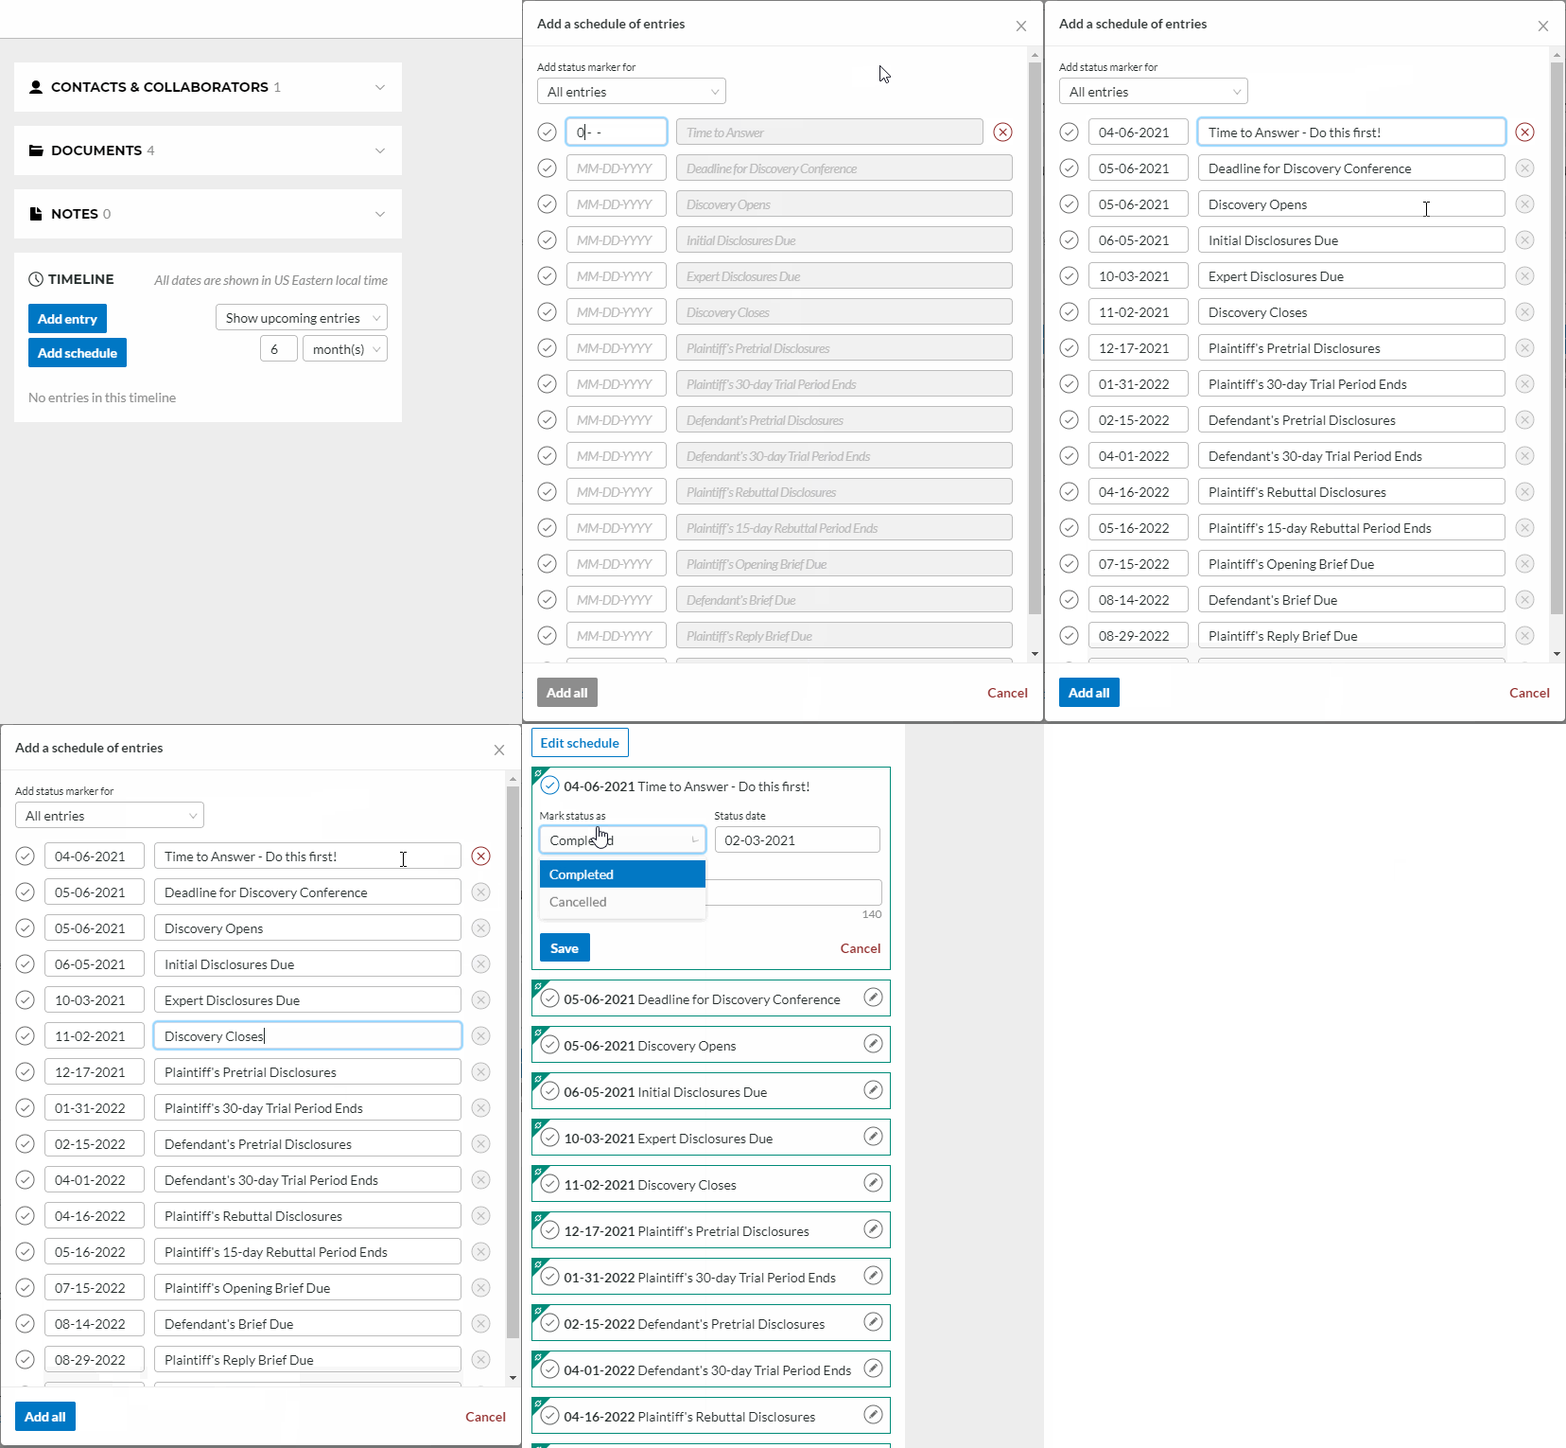
Along with the ability to enter a timeline entry into a dispute, we also offer a way to populate all the dates indicated by the TTAB quickly and efficiently. To generate those dates, follow these steps:
- Click “Add Schedule”
- Enter the date for the “Time to Answer”.
- Click “Save All”
Once you’ve completed an action from the schedule dates, simply click the round checkmark next to the date and indicate that it’s been completed or cancelled.
Editing Schedule Dates:
Once your timeline is populated with the schedule dates, you’re able to edit them either individually, or as a whole. Editing them will automatically update the following dates.

